Tuesday, February 21, 2017

Silhouette Portrait Project

I have been reorganizing and re-situating things lately. When we moved in 2 Octobers ago, I put things up fairly quickly. Mainly because I wanted it to feel like home, but also, having things sit around in boxes drives me nuts. I found a decent spot, and hung it up. It's been fine, but lately I have been wanting to really design areas I just passed over before. With this comes brainstorming and budgeting.

I have an idea for a wall collection (you will have to wait on that one), but with this idea comes a project...a project I started with because it would be free, but now, I am really excited about it.

Silhouette portraits of my kids.

I had a collection of 3 mirrors I got awhile ago and was never too thrilled about where I had them. Mirrors are tricky. I like the concept of bouncing off light and making a space feel bigger, but placed too low and I catch my face. It's not a terrible face, but I don't care to see myself two dozen times a day as I walk down the hall.

I would pop out the mirrors and use the frames. The frame shape is the best part. (Saving the mirrors in case a project pops up later where I can use them.)


Then I painted it with my favorite paint to help the frames blend in to my other wall decor. (Distressed them later to make them look more antique.)


Then the insert, the actual silhouette portrait. For that, I used my kids and both our patience. All you need is a profile picture. Lorelai handled this fine...not to happy, but I got my shot.


Addy was a little trickier, she kept wanting to talk to me, and not look in front of her...but again, I got what I needed after a couple of tries.


Last, Finn...obviously there is no explaining to a 4 month old that he needed to look a certain direction and stay still for a couple seconds...so that took longer to capture. After about 10 minutes, I got one I could work with,


Next, you print out the pictures. You then do something sort of strange and trace their profile with a pen/marker, color their cute little faces black with a thick marker, and then cut out. Now, if you notice, I took some creative liberties on filling in certain features that didn't make it into frame, but their noses, lips, foreheads, eyelashes...all the stuff that makes up their perfect portrait, that's all original. ;-)


I know they will grow, and their faces will change, but I like the idea of leaving these as their ages now. I look forward to hanging these up soon. ♥


M.LEWIS


Saturday, January 28, 2017

Antique Window Project

Yay! Project time!

It's been awhile since I've had a project to do. With a newborn, homeschooling a kindergartner, and stubborn as-all-get-out 3 year old, I have had a lot on my plate...which comes with a fair amount of stress. I needed something creative to do to relax. What better than making something pretty for the house?

I have always loved the look of those antique window frames used as wall decor. Examples:::


Unfortunately, with most things I like, the cost for a true vintage window (especially the size one I wanted) would cost around $75 at least.

So, as usual, it was off to Hobby Lobby for supplies so I could make my own version for less.

Wood...frame and cross pieces

Initial frame

Laying out the look before I break out my saw

All set...now paint

First layer of paint, white...then gray paint, a crackle glaze, sanding, and lastly antiquing technique 

Finished product on the wall

Close up sample of the frame's layers

Added wreath

The full effect
I bought the wood, 2 paint colors, the crackle glaze, and a pack of sponge brushes. (Antiquing paint I already owned.) Grand total: $33.

I am very pleased with the results and I look forward to the next project that pops up! 


Tuesday, January 3, 2017

The Love Affair With The Candlesticks Continues...

After the nativity scene came down, I needed to figure out how I wanted to configure my diningroom table with my new lovely candlesticks.

The last piece of my design plan arrived today, and it's safe to say, I love it.
(Excuse the cell phone pictures, my youngest has been fussy all day, so it's amazing I could do it all.)

The front view. Candlesticks, mercury glass votives, wood coasters, burlap table runner, and the newest addition: pip berry candle rings.


My favorite votive...reminds me of Oma's house.

All very simple, but effective.

I think the wood coasters add a real rustic edge I love.

Here you can see how the tablescape ties into the collection of vintage botanical prints I have on the wall. 

The decorative edge on the burlap runner adds a bit of delicateness needed for a diningroom, but still keeping things causal.  


Close up on the pip berry rings...I love the collection of colors in the rings. Also, another angle on the votives, every one is different.

And one last shot of the pip berries. :)

Ok, I promise this will be the last post on the candlestick decor...for now. ;-) Thanks for indulging me!


M.LEWIS


Thursday, December 15, 2016

Candlestick Table

A type of post I haven't done in awhile is my "how you get the look for less" posts...and I love those.

My latest purchase (before we were hit by the strep monster):


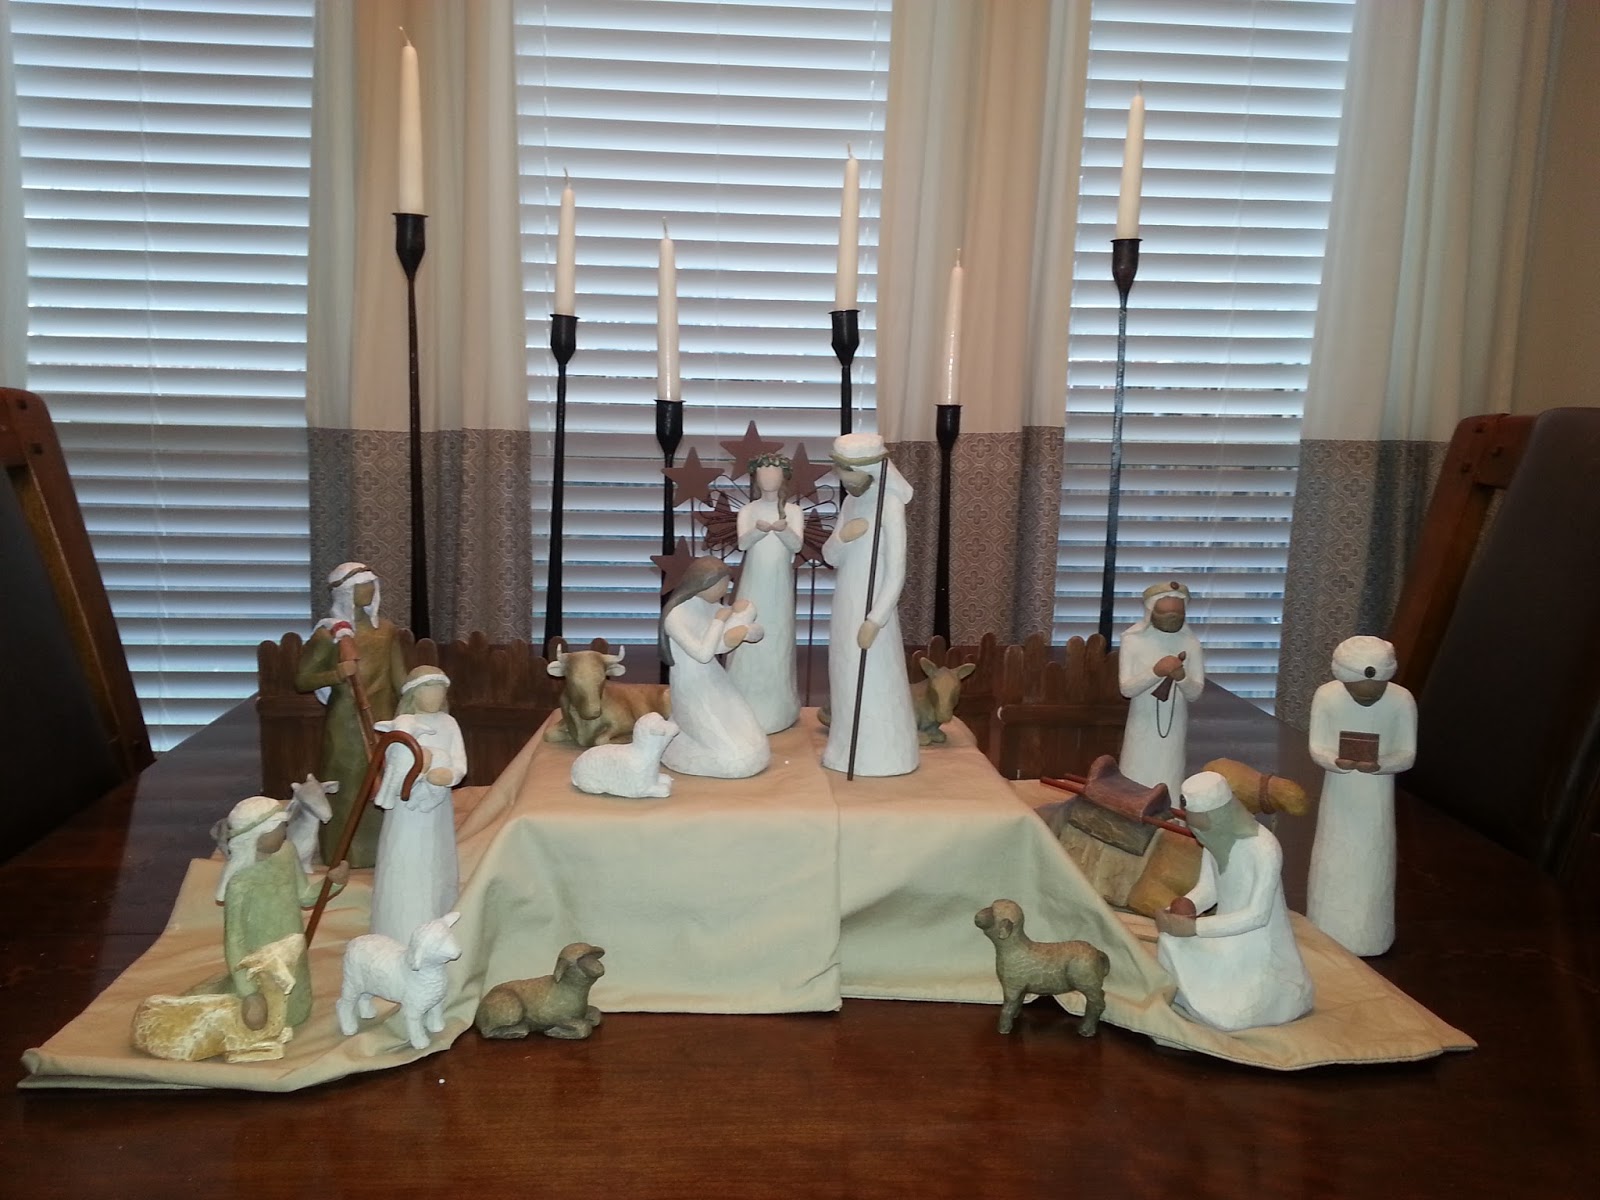
If look beyond my nativity scene, you will see tall, wrought iron taper candlesticks. 3 different sizes ranging from around 24" down to around 18". Bought at Hobby Lobby at 50% off. Purchase price: $10/$8.50/$7. Total (including tax) : $55

I found these Pottery Barn candle sticks (out of stock) for far more:


Large one alone $50, smaller $35...before tax. If I got 3 of each size, to get the same tablescape look, the total would be (including tax): $276

That blows my mind.
I love Pottery Barn and will happily spend gift cards there, but overall, Hobby Lobby just makes far more sense. Get the look and don't be broke. ;-)

I look forward to playing around with the candlesticks after Christmas and the nativity scene is put away.


M.LEWIS

Sunday, December 11, 2016

Finn's Arrival

The more kids I have, the more time goes by in between posts...sorry about that.

I did want to write down my experience delivering Finn before too much time went by...I have my accounts of the girls, and he needs one too. :-)

Since Mr. Finnian was measuring so big for so long, they scheduled me for induction asap. His due date was 10/23 and he was scheduled for an early arrival on 10/17.

That morning we dropped the girls off at my mom's and Chris and I went to the hospital around 7am. Pitocin, antibiotics, and extra fluids in IV's by 8am. I knew the drill and we were cruising along nicely. My Dr. checked on me around 10am and said she hoped for a "lunch baby." A few hours away? OK!

I got my epidural in around 11am (I was on the fence for half of the pregnancy about getting one...the first half...due to the failure of my epidural with Addy.) and boy, was it needed. Dilation progressed quickly after the epidural and around 12:45pm and when my Dr. came in to check on me then, I was 12cm dilated (yes, 12!) and I was in a lot of pain (even with the epidural) and I wanted this baby boy out! It seemed to take forever, squeezing Chris' hand, waiting for the Dr. and nurses to set up everything. When it was time to push, I was more than ready!

It took only 3 rounds of pushing (approx 10 mins) before I was told to stop. "Oh, he's heavy." I heard my Dr. say...but that's something I knew already. ;-)  I felt some tugging, and then, I heard the best sound in the world. The cries of my Finn filled the room. He was here! I then saw his cute, chubby face and he was placed on my chest. Gooey, swollen, and beautiful, Chris and I finally met our son.

"Let's weigh him...I want to know how heavy he is." my Dr. said after about 20 minutes of cleaning and cuddling.

9lb 7oz; 20 3/4 in, Finnian George Lewis was born at 1:08pm on 10/17/16.

Big, cuddly, sweet, and the perfect addition to our family; everyone was overjoyed to have Finn in the family...especially Lorelai and Adalaide. They are the proudest and most loving of big sisters...which makes my heart happy.

While Finn is definitely my biggest baby, with the most uncomfortable pregnancy...his delivery was the fastest. Recovery took much longer with him. It may be his size, or the fact that I have 2 kids already at home, but my body took much longer to regain strength and endurance. He doesn't sleep as long as I would like at night, but we're getting there. Breastfeeding has been a struggle (just like the girls) but he is happy and healthy with supplementing with formula...actually it's more like formula with breastmilk supplementing...that's how unefficient my body is, but oh well. Yes, I know all the tips and tricks, the herbs, the vitamins, and special tea...it's just the way it is...and I'm ok with that. My pediatrician is supportive and I have no serious worries about his growing and development. I have been blessed with 3 healthy children!

Now, to tend to the little man himself...

Welcome to the world Finn, you are where you belong for sure ♥


*Please excuse spelling and grammar errors, no time for proof-reading! ;-)


-M.LEWIS

Saturday, June 4, 2016

Finn's Nursery

My, oh my...it's been awhile!

Well, I do have something to write about now, and that's worth sharing...

As you know, we are expecting baby #3, and a couple weeks ago we found out this baby is a boy! We are all very excited, but of course, the name battle was waiting. Luckily, Chris and I don't spar too long on a name once we know pink or blue. This time was no different. After a week or so, we have landed on a name! Baby boy is named Finnian George Lewis. We'll call him Finn.

Once a name was in place, his nursery setup was required. I blame a little of my early preparation on nesting, but mainly on the part of my personality that likes to be organized and ready-to-go far before it's necessary. Along with his bedroom, I have to make his crocheted baby blanket (my SiL has graciously offered to make him a quilt, it's going to be lovely) and I have to make his Christmas stocking. Early? Yes. But I do not want to be cutting and sewing while holding a baby...beads, sequins...yeah, no thanks.

But first, his room.

When we built the house we made sure we had 3 bedrooms for kids...we knew we weren't done yet. It already had the baby crib, the glider and ottoman, and dresser/changing table placed. I already bought some curtains for the window and had one shelf installed.
The furniture is all dark, for it was less expensive and easy to match back when we bought it for baby Lorelai. Worked fine for the girls with their pinks and greens, and works even better with blues! Thinking long term since the beginning, we made sure none of our big baby items were gender specific. Who wants to re-buy everything?!

The theme I fell in love with for Finn? Woodland mountains. Moose, bears, pine trees, camping...it fit my style, and it was different from the apparently popular nautical themes. Boats, fishing, lighthouses...no thanks.

I painted the shelf brackets gray and covered the white shelves with dark contact paper to blend in better with the furniture (and theme) and to take away some of the delicateness from the girls' hand-me-downs.

I stuck with basic patterns and colors for the main bedding and such and made the theme an "easy to take down later" feature with inexpensive wall decals and wall hangings. It's all about long-term functionality, people.

I found a set of animal wall stickers I loved for not that much $, but I couldn't find pine trees by themselves. I made them...exactly what I wanted, and for far cheaper than I could buy. The combination worked out very well. With a trip to Hobby Lobby and Target for the other accessories, I was done pulling together the space in a few days. Thank you, Amazon Prime for being a big part of the timeline. The goal was something cute, engaging, fast, and inexpensive. DIY did play a part, and here is the results:


Just like his sisters before him, I made him his name with custom colors and patterns. The wooden letters were ~$1.50 a piece before sales/coupons at Hobby Lobby. Paint ~$1 for each color (navy, gray, sage, and light blue). Total for wooden name: ~$11.50
The tree decals I made simply from a roll of green contact paper and a roll of wood grain printed contact paper. I drew the shapes and cut them out...easy. Total for contact paper: $17
Baby blue bedding and gray crib skirt from Target. Both on sale for a total of: ~$23
The green blanket is a place-holder for my hand-made baby blanket...so much work left. (And the quilt!)
Wooden rocking horse, mine from when I was little, and random bin of toys...yeah, that's been around for a while too. 


The arrow, paddle, and stars were also purchased at Hobby Lobby. The stars came unfinished, but I had the paint at home for them already. $5 each before sale. The paddle was the "big" purchase at $17...no coupon... and the arrow was ~$12. Total for name accessories: ~$35
You can also see a close up of his patterns on his name.


Here is his mobile. It was the girls', but I stripped it of the girly parts and made my own pieces to fit my theme. Made out of felt, the mountain, teepee, tree, and arrow were a great .33c a piece buy. simply cut out and glue. The jute rope I had on hand, and I just covered the arms for some color and texture. Total for mobile makeover: ~$1.45!


Here you see some forest animal stickers and tree decals. They came in a set (more animals in a minute) from Amazon for $16. You also that I used left-over wood grain paper to cover the shelf. I painted the brackets gray with on-hand chalk paint (love that stuff) and I got the book/toy shelf from Addy's room. It never matched her stuff, so I bought her a white bookcase and stole this guy. Round about price for putting this shelf here, $18. The bins were an additional $16...the toys on the shelf, our collection compiled over the years.


More animals! Deer, hedgehog, bird, and bear...mushroom accents and another tree...price for set listed previously. I did add some grass from the left-over green paper. Clouds were made with on-hand white contact paper. No additional cost. Shelf again with wood grain paper and gray chalk paint. Bunting made from left-over felt and on-hand jute rope. Free. The 2 pictures on the shelf were bought. Blue one, from Hobby Lobby for $30 before sale (ouch! but it was too cute). The teepee one, from Target, $15. Total: ~$32
The cute arrow lamp? From Target...though it seems to be unavailable right now, sorry, no link. ~$20
Green changing pad cover, already had from the girls. No cost


Curtains were already purchased...and that coffee table needs a better home (once we clean out the closet for the baby swing, cradle, walker, etc). Raccoon buddy and bird from the animal set, and you see more trees and clouds previously mentioned. This shot has needs no listed additional cost.

Sounds like a lot? It did to me when listing it all, but it really was reasonable. Total for all new purchases: $201.95 My goal was $200...so I did go over a little bit, but not by much!

A nursery made for $200...your budget may be bigger or smaller, but I think this is one cute room for the cost. Baby Finn's room is ready!

I have to fill up his drawers and closet with boy clothes now...and yes, I have already been working on that.


I have forgotten how tiny newborn clothes are! So cute! Who ever said shopping for a boy isn't as much fun was completely wrong.

I have to finish his blanket and stocking during the summer, which is doable for sure. We're so excited for your arrival Finnian!
Tuesday, April 19, 2016

McKenzie's Flower

For hours now my mind has been racing, and my heart has been aching.

As many of you have know, I have been following and sharing a little girl's journey through cancer. Kenzie, 2, was diagnosed last spring/summer with neuroblastoma. Her story was shared with me by a mutual friend, and instantly, this child had my heart. She was a cute, blonde- haired, blue-eyed little girl who loved Disney princesses. I immediately saw Addy in her. Addy was also 2 at the time, and well, the rest of the similarities are evident.

I ran the #Kenzie5k and donated multiple times to their GoFundMe page (any additional donations would be greatly appreciated) and I prayed for Kenzie and her family every night. The mom in me was sure that this little girl would make it, for no mother should lose their toddler to cancer...

As the months went on, Kenzie's condition grew more complicated, and her prognosis became grim. I still prayed along with many, many others for her health to improve, her pain to disappear, and for her to feel no fear, just peace...and yet, she did not get better.

Lately, it was painful to read the updates, to see the pictures, to watch the videos...this little girl who reminded me so much of my spunky little one, was in fact, dying. She became weak, tired, more in pain, uncomfortable, and unhappy...to say the least. Tumors grew, mishaping her sweet face and paralyzing her tiny body. I would always look at Addy, even on her most difficult days, and thank God for every tantrum, every whine...for she had the energy to be 2...now 3.

Sadly, Kenzie won't have another birthday like Addy.

Kenzie died today, surrounded by her parents and family. A little soul taken far too soon.

I struggle with this. Not only for my children currently happy and healthy, but for the new baby growing inside me. This little helpless creature whom I love as much as their siblings before them. What's to say this can't happen to me? To them? They are not the only ones who are helpless.

This morning, before Kenzie's passing, I noticed something odd. I have this rosemary plant on my porch, which I have had for over 5 months. (I know, I haven't killed it, that in itself is a miracle.) Today, something was different. Today I noticed there was a single, small flower blooming in the middle of the plant. I didn't even know rosemary produced flowers...but there it was.

Fast forward to this afternoon, and I felt the strong urge to do something after hearing of Kenzie's passing. I didn't know what, but again, that mom in me wanted to show the love for this little girl. I just sort of stood there, shocked, heartbroken, and lost...I then remembered the flower.

That little purple flower...purple...Kenzie's favorite color.

Somehow in that minute, I realized Kenzie didn't need to be shown love. She had all the love she needed. Even in the midst of her painful fight against cancer, she was given everything that she needed. Her parents, her brother, the support of hundreds...she was given everything she needed here on earth, and in the end, what more could we ask for? God was showing me that my prayers were not ignored, he heard them all; not just my prayers, the thousands of prayers regarding sweet Kenzie. Kenzie would be healed, Kenzie's pain would fade, and she would feel no fear...all in his time, in his way.

Her death still brings tears to my eyes. The loss of a child is something I pray I may never experience...but all I can do is give my children everything they need while we are together. Unconditional love, understanding, support, patience, and the occasional treat.
The grief her parents and family are going through must be agonizing...and while I know with their faith they will work through it, I know Kenzie will be in their hearts and minds forever...as she will also be in mine; along the hundreds of others who cared for Kenzie...and for all the children who's stories are like Kenzie's.

I have been watching butterflies visit the small purple flower all afternoon, and I choose to see the symbolism in it...angels welcoming McKenzie home...


M.LEWIS